Output on a LCD
Comprehensive SPLC780D/HD44780 library
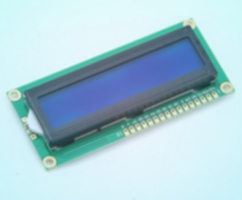
LCD Character Module | posted on Tu, 15 Sep. 2015
Initialization sequence
unsigned char LcdInit(unsigned char increment, unsigned char shift, unsigned char display,
unsigned char cursor, unsigned char blink);
The required sequence to initialize the display is strict and is implemented in the function unsigned char LcdInit(unsigned char increment, unsigned char shift, unsigned char display, unsigned char cursor, unsigned char blink);. The output of the function is SUCCESS0 if everything goes ok. Be warned that even if the output is SUCCESS0, that doesn’t mean that the information was successfully transferred to the display. It only means the functions were performed correctly and nothing got stuck inside the program. This is pretty much the same for every other function described ahead. Unfortunately, these displays don’t output any information before they are initialized. And even after it, they will only have a busy flag. So if you mess up you will not know.
Now I will explain how to setup the inputs. In the demo program the initialization is defined as LcdInit(INCREMENT_MSK,OFF,DISPLAY_MSK,CURSOR_MSK,OFF);. OFF means, obviously, the option is disabled, though to enable them you cannot only use ON, you need to use the masks defined in the file splc780D.h.
In the first position you can either use OFF or INCREMENT_MSK. Defining this input instructs the display to increment or decrement the memory position after each write/read. This means, for example, you start by locating the first character to be in the second line/fifth position. If you have used the mask INCREMENT_MSK, then after you write/read into that memory position the cursor automatically will increment to the next position. In case it’s OFF, we have the opposite result, the cursor will decrement.
In the second position we define the display shift. If you use OFF, then the display do not shift each time you write something into display memory. However if you define SHIFT_MSK, the display will change the displaying address while incrementing/decrementing the cursor. For example, if you turn on INCREMENT_MSK and SHIFT_MSK, then when you write in the display memory the information that is on the display will go to the left. This is because you´re actually changing the memory that is shown on the display. When you start the LCD, you will always have visible the contents of memory space from 0x00 to 0x07 (in case of 8 characters displays). But if you use the shift function as configured in the above example, the LCD will display the memory position 0x01 to 0x08. You should try this option using the function void LcdEntryMode(unsigned char increment, unsigned char shift); (note that the input of the function LcdEntryMode is only ON or OFF) to understand the flow of things. This is without any doubt the most difficult behavior to explain properly.
I know that I promised pictures and videos, but I don't have any other way to properly explain this. So, continuing.......
The CURSOR_MSK instructs the display to show the cursor. This is a visual aid to let you know where the memory pointer is. The cursor is drawn in the bottom row of the character space. If you don’t want to use cursor just choose OFF.
Finally, the last one :). The fifth input is the cursor blink. To use this feature you need the mask BLINK_MSK. This makes the present location of the cursor to blink and it’s cool. Once again OFF will turn off this feature.
LcdInit usage warningOFF and use the specific functions to activate the features that you want to use further in the code.
Control functions - Generic
void LcdWriteCmdByte(unsigned char data);I recommend you to use the specific library function for each LCD command. However you can use the function
void LcdWriteCmdByte(unsigned char data); if you want flexibility in sending a command to the display.
unsigned char LcdSetLocation(unsigned char line, unsigned char pos);
unsigned char LcdSetCGRAMLocation(unsigned char chara, unsigned char pos);
void LcdGetLocation(unsigned char * line, unsigned char * pos, unsigned char * mode);
void LcdGetCGRAMLocation(unsigned char * chara, unsigned char * pos, unsigned char * mode);
Before the first write or if you change from writing in DDRAM to CGRAM or vice versa, you need to define the location where to write/read contents. Use the
LcdSetLocation to set the location in the DDRAM to write/read. You’ll see further ahead the function LcdWriteNextDataByte, this function writes data in the actual position, however sometimes you may not know where is the current cursor position. I´ve implemented some simple cursor math and you can access the variable with the cursor information using the function LcdGetLocation. NOTE that the parameters are pointers to actually output data. They are self-explanatory. The only variable that is worth mention is the return from unsigned char * mode. If you´re writing to the LCD and the functions to write start to send you errors back, just read this variable and check if the cursor is OUTOFBOUNDS. This is a mask to test the variable mode. If the result is true then you need to redefine the cursor position.
unsigned char LcdSetBacklight(unsigned char status);
void LcdDisplayClear(void);
void LcdReturnHome(void);
The function
LcdSetBacklight changes the state of the backlight pin. It does return SUCCESS0 if everything goes well or ERROR0 if the pin is not defined. The input is either ON or OFF.
Using LcdDisplayClear clears the display and set the DDRAM address to location 0x00.
The last utility function is LcdReturnHome. With this command the cursor is reset to the position 0x00 and any shift is also reset. The contents of DDRAM are not changed at all.
Another big step is done. If you've read everything so far you deserve to be congratulated. Next we will see specific LCD command functions.
LCD Character Module
TAGS
LCD 16x2, SPLC780D, HD44780, LCD library, write to lcd, read from lcd, 4 bit lcd mode, 8 bit lcd mode