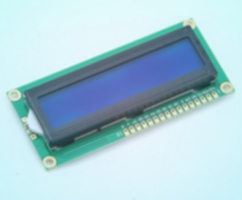
Output on a LCD
Comprehensive SPLC780D/HD44780 library
LCD Character Module | posted on Sun, 11 Oct. 2015
Display data
Now to the easiest part, displaying the data. So far you've learned how to manipulate the controller, emphasizing in memory operations. Despite of the whole range of settings of these controllers, you'll only need to tweak some few settings to make simple day-to-day data display.
unsigned char LcdWriteDataByte(unsigned char data, unsigned char line, unsigned char pos);
unsigned char LcdWriteNextDataByte(unsigned char data);
To display data, I've created two simple functions. The first function LcdWriteDataByte is the most complete function allowing you to define what and where to display your data. The function LcdWriteNextDataByte is a simpler version where the information is displayed following the logical sequence defined in the settings. If you're not paying attention, there is a simple cursor tracker to allow the program to know were you're writing/reading.
Lets break down the function LcdWriteDataByte. The first parameter is what you want to display, remember that this is ASCII code, however there are additional characters that can be used but those should be consulted in your display controller datasheet. Remember also that your custom characters are to be displayed with this function. The second parameter is the line were you want to display the data. If you want to write in the 1st line you write a 1, simple. Then the last parameter is the position. If you want to right in the first column of the display you shall use 0x00, and so on.
The function LcdWriteNextDataByte is even easier. You can start by either using the function LcdSetLocation or LcdWriteDataByte and then use LcdWriteNextDataByte to display data in the next position. If you cross the row memory border by mistake you will get a overflow flag (see function LcdGetLocation for more details). Example:
const unsigned char msgBlink[]= "Blinking Cursor";
LcdSetLocation(1,0);
for (unsigned char i=0  ; i<16 ; i++)
{
    LcdWriteNextDataByte(msgBlink[i]);
}
FOR loop. If you read 16 characters but your variable only has 15, then you'll probably lose control of your program flow.
On the previous example I started by creating a variable with the message I wanted to output, then I set the position of the cursor and flushed the contents of the variable into the display with the function LcdWriteNextDataByte
Read data
To read the memory of your controller it is mandatory to have the pin RW of your display controlled by your MCU. Reading information from your LCD controller has the same logic as writing into DDRAM memory (display data) but it will have a reversed direction of data flow. So what you need to know is just what function to use. And here it is:
unsigned char LcdReadDataByte(unsigned char * data, unsigned char line, unsigned char pos);
And to finish a example:
unsigned char readStartPos=0;
unsigned char	dataRead=0;
unsigned char * dataReadptr=&dataRead;
for (unsigned char i=0; i<6; i++)
{
LcdReadDataByte(dataReadptr,1,readStartPos);
readStartPos++;
}

LCD Character Module
TAGS
LCD 16x2, SPLC780D, HD44780, LCD library, write to lcd, read from lcd, 4 bit lcd mode, 8 bit lcd mode