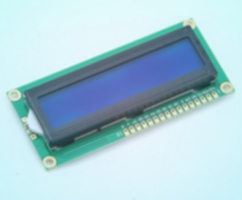
Output on a LCD
Comprehensive SPLC780D/HD44780 library
LCD Character Module | posted on Mo, 20 Oct. 2015
Create and display custom graphics
Finally the last part of this article. One fun thing about these displays is that you can create your own custom characters. The total amount of memory available for it is not that big, however you can change the characters as much as you want and on-the-fly. I like THIS example, I hope it can inspire you to do great things. I also leave HERE a link to a webpage where you can create your custom character and obtain the hex code for it.
unsigned char LcdWriteCGRAMByte(unsigned char data, unsigned char chara, unsigned char pos);
unsigned char LcdReadCGRAMByte(unsigned char * data, unsigned char chara, unsigned char pos);
unsigned char LcdWriteCGRAMNextByte(unsigned char data);
unsigned char LcdSetCGRAMLocation(unsigned char chara, unsigned char pos);
void LcdGetCGRAMLocation(unsigned char * chara, unsigned char * pos, unsigned char * mode);
unsigned char LcdCustomCharWrite(unsigned char customChar[], unsigned char sizeofChar, unsigned char CGRAMadr,unsigned char line, unsigned char pos);
Don´t get frightened by the amount of functions, these are similar to the functions of displaying standard characters and they are really easy to use. Some of the functions will not be explained because they're similar to previous explained functions. Note the functions LcdGetCGRAMLocation, LcdSetCGRAMLocation that allow to get/set the pointer location in the CGRAM address. Is important to point that if you set the pointer to a CGRAM location you need again to set the pointer to a DDRAM location if you want to work with DDRAM. The only new function here is LcdCustomCharWrite, and below is an example of how to use it:
const unsigned char msgCGRAMexample[]= "CUSTOM CHARACTER";
LcdSetLocation(1,0);
for (unsigned char i=0; i<16; i++)
{
    LcdWriteNextDataByte(msgCGRAMexample[i]);
}
LcdWriteCGRAMByte(0x00,0x00,0x00);
LcdWriteCGRAMNextByte(0x04);
LcdWriteCGRAMNextByte(0x0E);
LcdWriteCGRAMNextByte(0x1F);
LcdWriteCGRAMNextByte(0x04);
LcdWriteCGRAMNextByte(0x04);
LcdWriteCGRAMNextByte(0x04);
LcdWriteCGRAMNextByte(0x00);
LcdWriteDataByte(0x00,2,0x00);

unsigned char pacmanopen[] = {0x0E,0x07,0x03,0x01,0x03,0x07,0x0E,0x00};
unsigned char pacmanshut[] = {0x00,0x0F,0x1F,0x01,0x1F,0x0F,0x00,0x00};

unsigned char	actualChar=0;
unsigned char * actualCharptr=&actualChar;

unsigned char	actualPos=0;
unsigned char * actualPosptr=&actualPos;

unsigned char 	actualMode=0;
unsigned char * actualModeptr=&actualMode;

LcdGetCGRAMLocation(actualCharptr, actualPosptr, actualModeptr);
LcdCustomCharWrite(pacmanopen, sizeof pacmanopen, actualChar, 2, 0x01);

LcdGetCGRAMLocation(actualCharptr, actualPosptr, actualModeptr);
LcdCustomCharWrite(pacmanshut, sizeof pacmanshut, actualChar, 2, 0x02);

for (unsigned char i=0; i<25; i++)
{
	LcdWriteDataByte(0x01,2,0x03);
	__delay_ms(40);
	LcdWriteDataByte(0x02,2,0x03);
	__delay_ms(120);
}
The program above is a little bit more advanced but it's really easy. I start by using the function LcdWriteCGRAMByte to write in the first character 0x00 (2nd parameter) in the first row 0x00 (3rd parameter), the value 0x00 (1st parameter) which corresponds to a blank row. This is the first row of the arrow (see the picture above). The function LcdWriteCGRAMNextByte writes in CGRAM the remaining rows of the arrow. Then I use the function LcdWriteDataByte to display in the 2nd line the custom created character 0x00 in the first column.
After it I will use the function LcdCustomCharWrite to write an array to CGRAM and display it. First I start by creating some pointers (if you don´t know what this is just go to wikipedia, there is well explained) and with the LcdGetCGRAMLocation I get the actual position of the CGRAM pointer (remember that I created a character before, the arrow UP). This should return the actual character and row in which we are writing. Then I use that information in the function LcdCustomCharWrite to write the Pacman (with the mouth open) in the next free character and I display it in the 2nd line, 2nd column. Then I repeat this flow for the Pacman with the mouth closed.
Read created graphics in memory
const unsigned char msgReadCGRAM[]= " -> Reading";
LcdWriteDataByte(0x01,1,0);
LcdSetLocation(1,1);
for (unsigned char i=0; i<11; i++)
{
    LcdWriteNextDataByte(msgReadCGRAM[i]);
}
const unsigned char msgReadCGRAM2[]="Char:1-Pos: ->" ;
LcdSetLocation(2,0);
for (unsigned char i=0; i<14; i++)
{
	LcdWriteNextDataByte(msgReadCGRAM2[i]);
}

readStartPos=0;

unsigned char null[] = {0x00,0x00,0x00,0x00,0x00,0x00,0x00,0x00};
LcdCustomCharWrite(null, sizeof null, 0x03, 2, 15);

for (unsigned char i=0; i<8; i++)
{
	LcdWriteDataByte(0x30+readStartPos,2,11);

	LcdReadCGRAMByte(dataReadptr,1,readStartPos);

	LcdWriteCGRAMByte(dataRead,0x03,readStartPos);

	LcdWriteDataByte(0x03,2,15);

	readStartPos++;

	__delay_ms(1000);

}
End.

LCD Character Module
TAGS
LCD 16x2, SPLC780D, HD44780, LCD library, write to lcd, read from lcd, 4 bit lcd mode, 8 bit lcd mode